
The arrival of Gutenberg Editor marked a new frontier in WordPress site building. Its Lego-like block editor provides unmatched flexibility compared to the once rigid, text-heavy WordPress editor of yore. However, with great power comes a steeper learning curve.
For those accustomed to the “old way,” Gutenberg can feel alien at first. All the dragging, dropping, and tweaking of modular content blocks may seem cumbersome compared to simply writing post body text and picking a title.
But once you grasp a few fundamental tips and tricks, Gutenberg starts to reveal its true potential. You begin to appreciate how the block approach mirrors the natural creative process, with a tactile feel more reminiscent of true design tools.
In this guide, we provide a roadmap to get over the Gutenberg learning hump and master its block-based workflow. With these techniques, you’ll be able to build the custom pages and posts you’ve always dreamed of with an efficiency never before possible in WordPress.
The foundation starts here. Let’s embark on your journey towards block editor enlightenment! With some guidance, you may just find yourself falling in love with crafting WordPress sites again.
Also See: Introduction to the WordPress Gutenberg Editor
Top 10 Tips for Using Gutenberg Editor
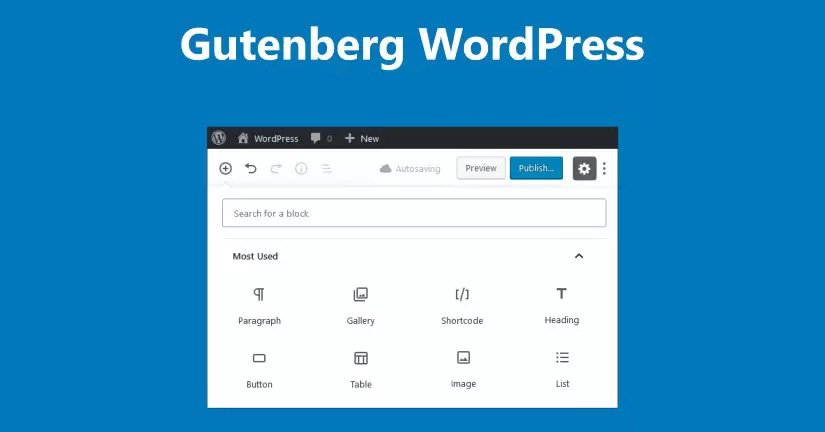
1. Use keyboard shortcuts in Gutenberg Editor
The mouse may reign supreme across most computing tasks, but to truly ascend Gutenberg mountain, your fingers need to dance across those keys. Learning a few choice keyboard shortcuts can rapidly accelerate your block editor workflows.
For starters, arrow keys allow swift navigation to select and highlight blocks. Once selected, blocks can be duplicated using Shift+Alt+Up/Down, deleted with Shift+Alt+D, or moved with alt+up/down. Ctrl+Z quickly undoes mistakes, while Ctrl+Shift+Z redoes.
Searching for that perfect block? Ctrl+Slash summons the handy inserter menu. Prefer writing distraction-free? Ctrl+Alt+F toggles full screen mode. And customizing alignment is a breeze with Ctrl+L for left, R for right and J for justified – with Shift modifying to wide alignment.
Once these shortcuts become muscle memory, you’ll find yourself flying through tasks that once required multiple clicks and tedious mousing. The keyboard causes the editor to bend to your will, not the other way around.
So spare your mouse hand, and keep those keys tapping. Mastery over Gutenberg requires making the whole editor your command center. Once shortcuts become second nature, that goal will be within reach.
2. Customize your blocks in Gutenberg Editor
The true power of Gutenberg lies in its ability to customize each block’s style. No longer are you forced to work within the constraints of pre-baked themes. Now, you can tailor every aspect of your content’s presentation to your heart’s desire.
Want to make a standout header? Adjust its size, color, typography and spacing right in the block toolbar. Need a styled content box? Tweak background colors, borders, padding and more. Dreaming of a stylized image? Change its size, add filters, pick rounded corners and labels as you please.
Don’t be afraid to experiment with different options to discover the looks that resonate most with your brand. The layouts you can create are limited only by your imagination.
This also applies to reusable blocks. Once you perfect a customized block for reuse across pages, changes made to the original propagate everywhere it’s used. Global style changes have never been easier.
Unleash your inner designer and refine every block’s aesthetic. Consistent, bespoke styles that uniquely represent you are now just a few clicks away thanks to the creative power of Gutenberg.
3. Employ block patterns
The empty canvas presented by a fresh WordPress post can spur creativity… or instill instant paralysis from not knowing where to start. To get your creative juices flowing, take advantage of Gutenberg’s library of block patterns.
These ready-made layouts allow you to hit the ground running by providing pre-built combinations of blocks tailored for different uses. Insert a pattern, then customize it to fit your content. Change text, swap images, adjust colors – the foundation is handled for you.
From columns with images to detailed news sections, the pattern options continue growing. And if you build a custom layout you want to reuse, it can be saved as a pattern too!
Employing these patterns saves time spent puzzling over how to present content. They provide an effortless starting point.
So whenever you face a blank new post, peruse the patterns for inspiration. Mix, match and customize until your vision emerges. The patterns do the heavy lifting, empowering you to focus on details that bring your creation to life.
4. Cover making same height, changing widths, adding more etc.
Columns form the building blocks of effective page layouts. And in Gutenberg, columns bend to your will with customize-anything flexibility. Want two equally tall columns? Adjust their heights to match with precision. Need columns of different widths? Drag their dividers to resize on demand. Ready for more? Add new columns with just a click.
This fluid approach allows crafting professional multi-column designs on the fly. Columns snap around content while staying responsive across devices. Reorder, resize and nest columns as your layout evolves.
Additionally, block settings like backgrounds and borders can be used across columns for visual cohesion. And if you need space between, simply add vertical or horizontal spacers to dial in positioning.
With this level of customization, columns enable dividing any page design into distinct visual zones. Break up walls of text, cleanly showcase media and creatively guide visitors through content journeys.
So embrace columns as the customizable foundation for your ideal page structure. In Gutenberg, multi-column layouts are just a few clicks and tweaks away.
5. Use a proper headings structure in Gutenberg Editor
With great power over page design comes great responsibility over SEO. When crafting pages in Gutenberg, be sure to utilize proper heading hierarchy for optimal search engine optimization.
Use Heading blocks to clearly establish topic sections in descending order like H1, H2, H3. This creates semantic structure that search engines can grasp. Equally important is using clear, descriptive headings that summarize topics.
Avoid skipping heading levels, like from H1 to H3. And don’t use headings just for visual formatting – reserve them for structuring important content sections.
Establishing this hierarchy may feel restrictive amidst Gutenberg’s freeform flexibility. But in fact, it will focus your content and make pages easier to digest for both users and search bots.
So while it may not be the most glamorous best practice, take care to architect your content’s outline with strategic headings. The SEO gains will make your site stand out in searches when visitors are looking for your knowledge.
6. Reuse and nest blocks in Gutenberg Editor
Once you perfect a custom block, why start from scratch each time? Gutenberg allows saving uniquely styled blocks for reuse across every page.
For elements you use repeatedly like callouts, content sections or bios, build once then reinsert whenever needed. Changes made to the original automatically propagate.
Blocks can also be nested within others to isolate formatting. Wrap a paragraph block within columns to have text filling the column. Nest buttons inside of panels to inherit their styles.
This modular, mix-and-match flexibility encourages thinking of blocks as visual elements. Assemble them in creative new ways to build polished designs faster.
So break free from the mindset of crafting each page individually. With reuse and nesting, your custom blocks become production assets. Think libraries, not one-offs. Combining these techniques will help Gutenberg live up to its time-saving potential.
7. Add block backgrounds in Gutenberg Editor
Visual interest is the spice of life, so flavor up your page building by adding backgrounds to blocks. With just a click, you can make any block pop with color, gradients, or images.
Restrain yourself at first to not go overboard. Subtle colored backgrounds behind paragraphs or content sections add polish without overwhelming. Vibrant gradients in moderation can draw eyes to key calls-to-action.
For a bolder look, use large background images as block anchors. A hero image behind your page title establishes the tone upfront. Product shots can accompany their details in style.
The backgrounds options are nearly limitless. But be thoughtful about alignment, contrast and padding so text remains readable. Treat backgrounds as finishing touches that accentuate content rather than distract.
Wielded judiciously, backgrounds enable visually arresting pages that feel cohesive and purposeful. They turn block boundaries into opportunities for creativity. So venture forth and allow your design instincts to dictate color and image choices that enhance branding and engage readers.
8. Save your work in Gutenberg Editor
In your zeal to build block editor masterpieces, don’t overlook one of the most crucial steps – regularly saving your creations!
The joys of shaping beautiful pages piece by piece can make you lose track of time. Before you know it, hours have flown by without hitting publish or saving as draft. Then calamity strikes – a browser crash or accidental click erases your unsaved work.
Save early, save often. For long pages, save after completing key sections or block milestones. Get in the habit of quick Ctrl+S taps every 5-10 minutes.
Treat saving like a reflex. Your fingers will do it instinctively, allowing you to stay focused on content flow and design. And you’ll avoid the soul-crushing anguish of losing work.
With Gutenberg’s modular, visual approach, inspiration can take you on long and fulfilling content creation journeys. But don’t neglect occasionally saving the map. Lost progress hurts, but consistent saving means you’ll never lose your way.
9. Leverage wide alignment
While full-width alignment has its places, leverage wide alignment to create eye-pleasing layouts. Wide gives blocks room to breathe while still containing them.
For example, a wide aligned image lets the shot shine while retaining clean edges. Wide buttons and content sections provide focus without monopolizing attention.
Take advantage of wide’s adaptability across screen sizes too. Narrow columns on desktop widen naturally on smaller mobiles. Find the combinations that engage without overwhelming.
Alternating wide and regular alignment adds visual interest while guiding the eye through content choreography. Dialed-in margins sharpen side-by-side block interplay.
So embrace wide alignment’s versatility. Use it to hone content hierarchies, highlight important elements and craft responsive layouts through its smart sizing. Finding the right wide balance unlocks pages that delight across devices.
10. Use list and spacer blocks in Gutenberg Editor
Lists and spacers may seem like supporting players among Gutenberg’s glitzier blocks. But in the right hands, they become page design powerhouses in their own right.
Lists lend order to disparate ideas. Beyond just bullets, customize ordered and unordered lists with indentation, spacing and styling. Nest lists within each other to build hierarchy.
Spacers add invisible organization. Insert spacing blocks between elements to guide the eye. Adjust their heights and widths to tweak alignments and positions between blocks.
Together, lists and spacers provide clarity. Lists group related concepts while spacers isolate them. Use both liberally to orchestrate content for comprehension and retention.
They also shine for visual polish. Dial in list and spacer sizing to align images, center text and craft balanced multi-column layouts.
So don’t overlook these subtle but transformative blocks. Harness lists and spacers to guide users smoothly through your ideas from start to finish.
Conclusion
The path towards Gutenberg enlightenment may seem daunting, but these tips show it’s within reach. Small steps like learning shortcuts, embracing wide alignment and structuring content add up to outsized rewards.
As these techniques become second nature, you’ll find yourself building the pages of your dreams faster than ever before. The editor begins to fade away, leaving just you and the endless possibilities of your imagination.
So take the first steps and experiment with these Gutenberg power user tips today. Immerse yourself in the modular mindset. Soon that blank page will transform into a polished vision exceeding your expectations.
The block editor’s potential for creativity and customization is boundless. Now you have a map to excel on your journey towards mastery. Keep these tips close and let Gutenberg unlock levels of WordPress page building you never thought possible. The only limit is your ambition.